
FLOWER HAIR CLIP // A DIY GUIDE
Today's do it yourself project is simple and lovely! I love flowers in just about any capacity and because I work in the wedding industry I am grateful to be surrounded by them on almost a weekly basis! I love these flower hair clips that Rhiannon Bosse made. Not only are the really beautiful but they are very easy to make. Rhi provided the detailed instructions which you will find at the end of this post!


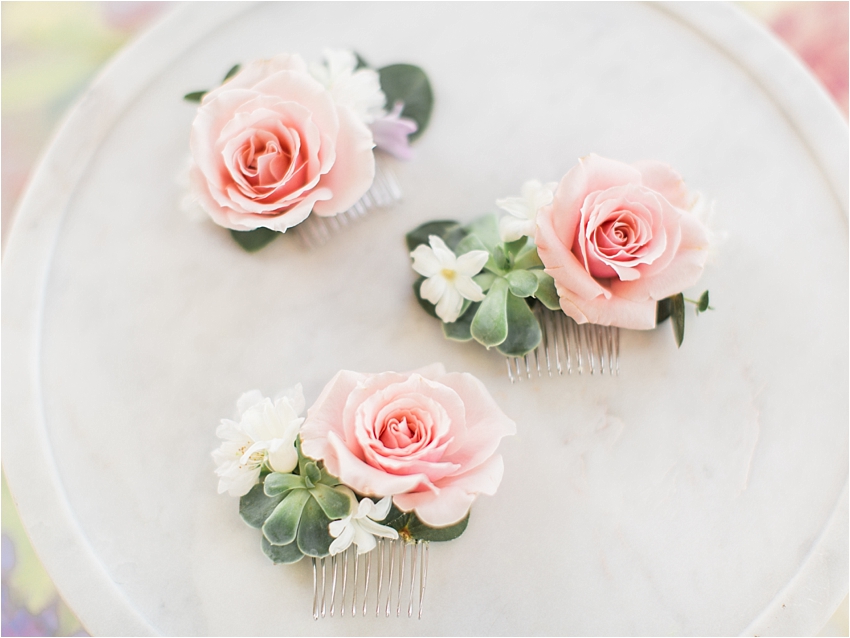
You will need a combination of medium sized blooms like spray roses, some hearty bits like mini succulents, and daintier pieces like the blossoms off of a hyacinth. A couple sprigs of eucalyptus works well for the foliage part because the leaves are very flat and durable, holding up well to the floral glue and metal hair comb.
You’ll also want the following items:
• Oasis floral glue
• floral clippers
• metal hair combs
• spare cardboard
The floral glue will need to dry out to get just the right texture. When the edges start to ‘bubble’ a little (as in the edges of the pool of glue you push out from the tube onto your cardboard!) so it’s tacky enough to ensure your flower pieces will adhere perfectly to whichever surface you’ve selected.
You will need to be patient with all of the parts and pieces so make sure you set aside enough time to finish what you start! You will want to create a base for the florals to adhere to. In this case the flat eucalyptus leaves were perfect. Rhi adhered three leaves to the front part of the metal combs, fanning them out from left to right. A little glue goes a long way! And the floral glue is sticky! So one thing you could also consider doing is making these with faux flowers and using a hot glue gun to attach everything should the Oasis glue be a bit too daunting.
One your base of greens is secure you can start adding on the floral elements. You’ll want to trim the stems of the blooms as short as you can so the bloom can sit as flush to the comb as possible. Dipping the cut stem into the tacky floral glue, ensuring it’s covered, and then placing it in the desired spot, be sure to hold it down for about 30 seconds to a minute. The goal is to make sure the glue dries enough to hold the piece in place even if it’s not completely dry. Handle with care and place each to the side to dry further. If it’s floppy or not sticking, the glue may not be ready or the piece you selected could be too large.
Once your focal pieces are on the combs you can begin to add in the accent bits and pieces. These little hyacinth blooms were perfect and had such a beautiful fragrant scent. Just a little glue on the end of where you plan to adhere it from is all you need. Rhi started with the bigger pieces as she built the comb and then added in the smaller pieces to help give her a better idea of how much real estate she had to work with; the combs are little so your fingers have to work carefully.
I hope you have fun trying this project!